Microsoft's Windows 11 operating system supports dozens of interface languages. The operating system comes with a specific interface language installed, but users may switch to another language using built-in options.
You may have several reasons for wanting to change the Windows interface language. Maybe you bought a Windows PC on the last trip abroad or over the Internet, and it comes in a language that you don't favor.
The instructions are in English, but should be easy enough to follow in most languages. It may require a bit of trial and error though depending on the language. If you bought a Japanese or Chinese PC, and don't speak the languages, you will have a harder time than figuring it out on a French PC if you speak Spanish.
Changing the interface language of Windows 11
Begin by opening the Settings application. You may use the keyboard shortcut Windows-I for that, or select Start and then Settings from the Start menu.
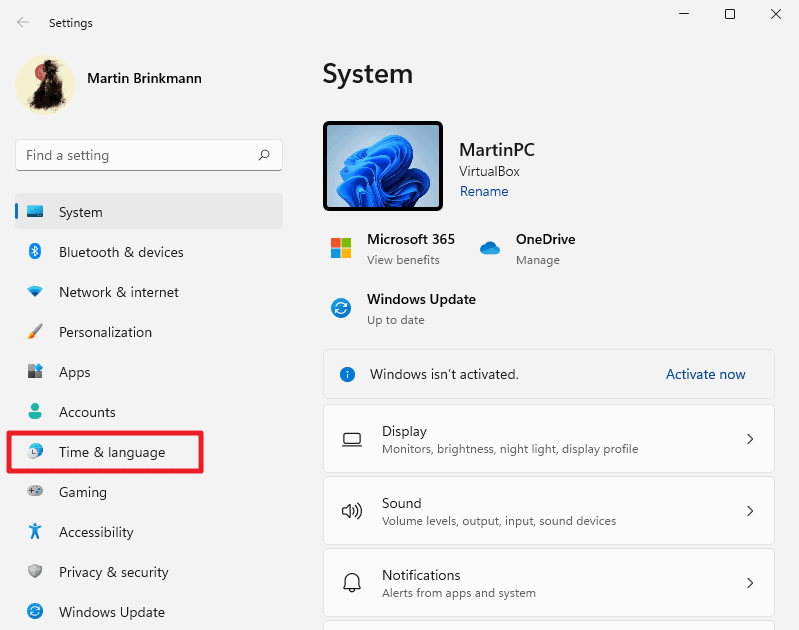
Select Time & language from the sidebar on the left.
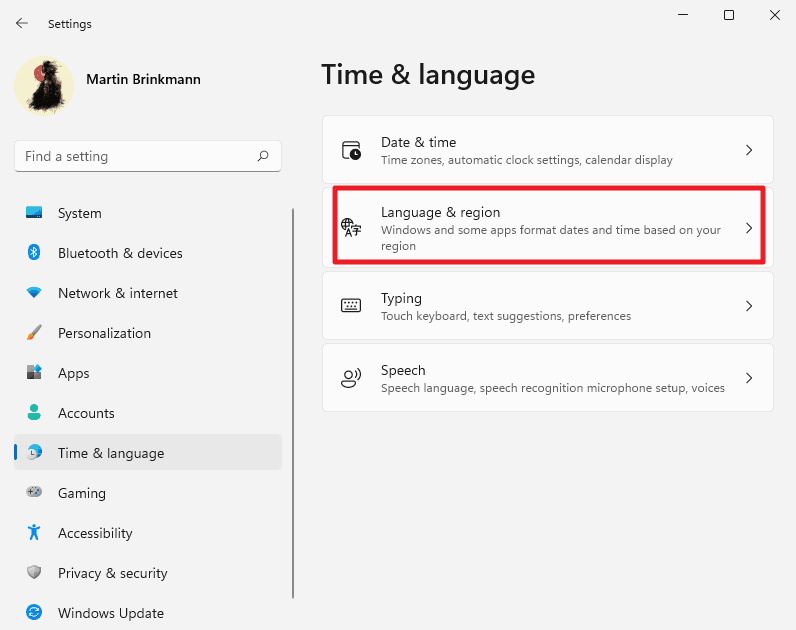
Select the Language & region option on the Time & Language page of the Settings app.
Windows 11 displays the Windows display language on the page and all languages that are installed. Note that installed does not necessarily mean that it can be set as the interface display language. Languages need to support certain components to be set as the display language.
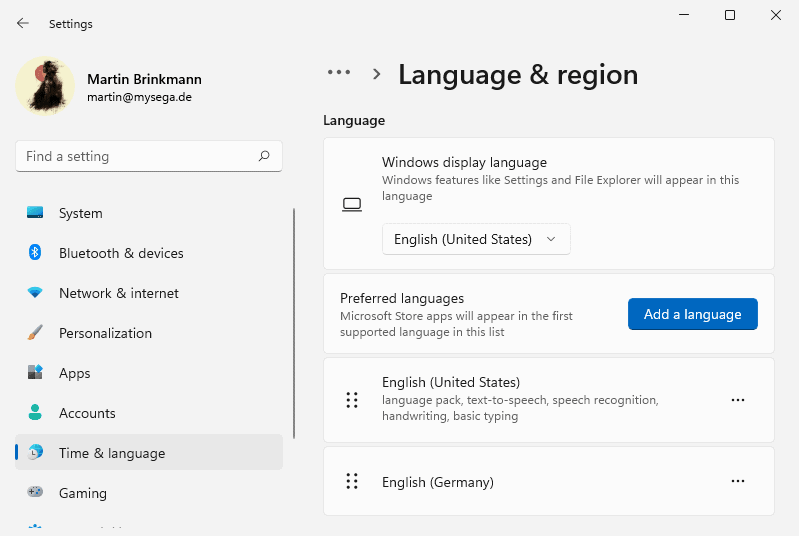
Select the menu under Windows display language to see if you can set different languages already. If you can't, check the list of preferred languages listed underneath.
Option 1: preferred interface language is installed, but can't be selected as the display language
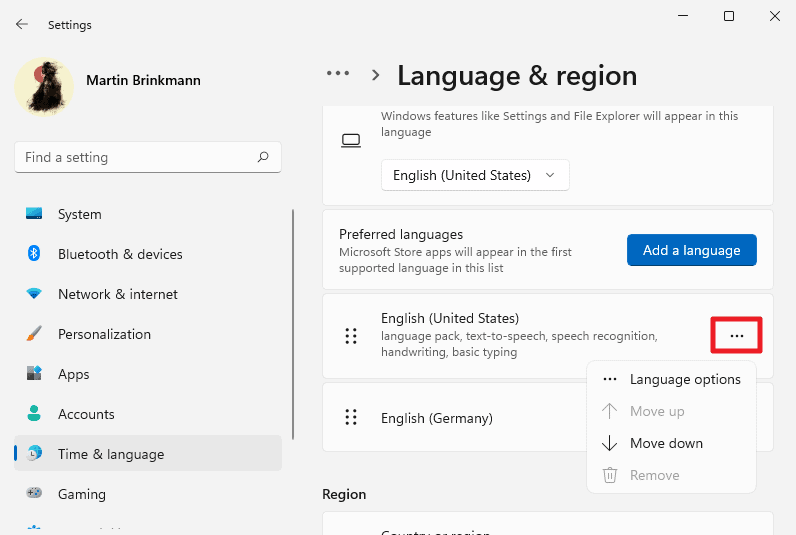
If the language is listed there, activate the three-dots menu to the right of it and select the "Language Options" context menu entry.
The Language options page displays available language features; these can be installed or not installed. Locate the language pack option and click on the download link next to it to install the feature. The language pack is the requirement for making languages the display language on Windows 11.
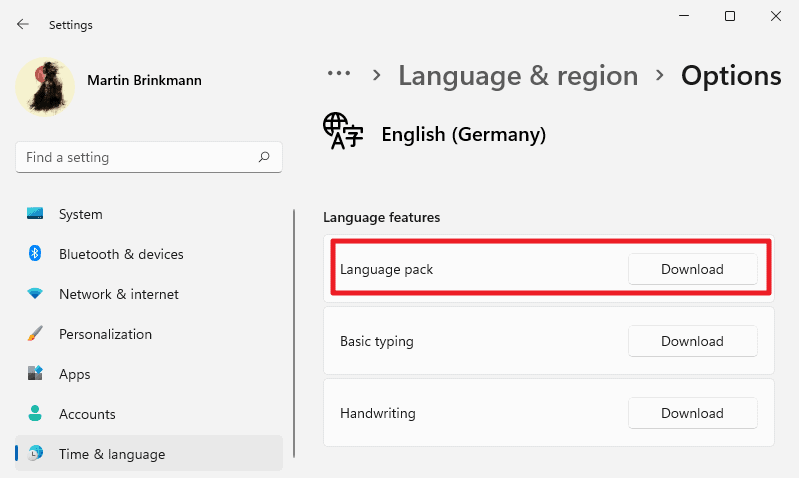
Once installed, go back to the main language and region settings page, and click on the Windows display language menu again to see if the new language can be selected from it.
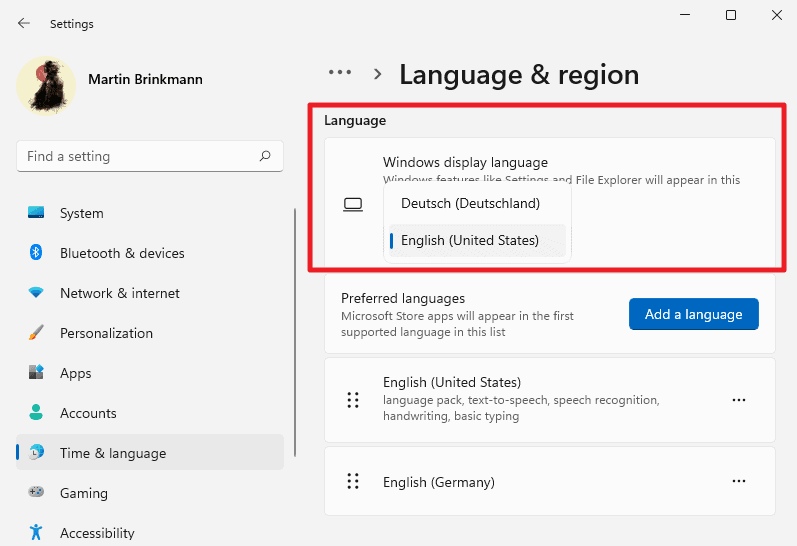
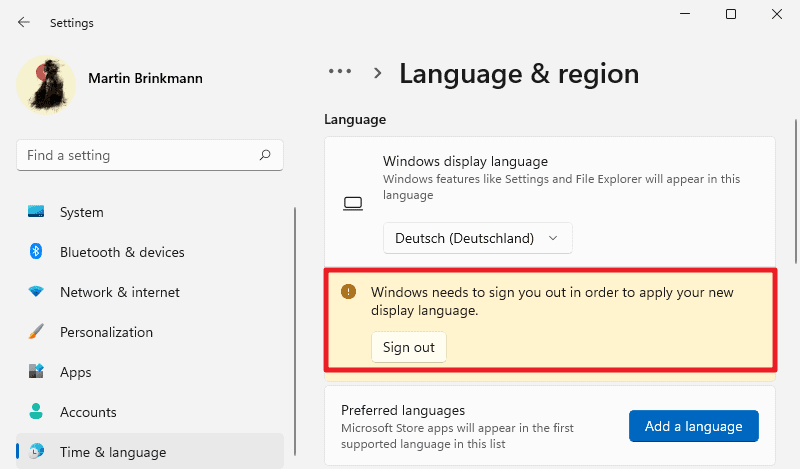
Select the new language. Windows 11 reminds you that you need to sign-out to switch to the new language. Note that you can change the language at any time using the menu, but need to sign-out each time before the change is applied.
Option 2: preferred interface language is not installed
If the preferred interface language is not already listed on the page, then it needs to be added first.
Select the "add a language" button to get started on the page.
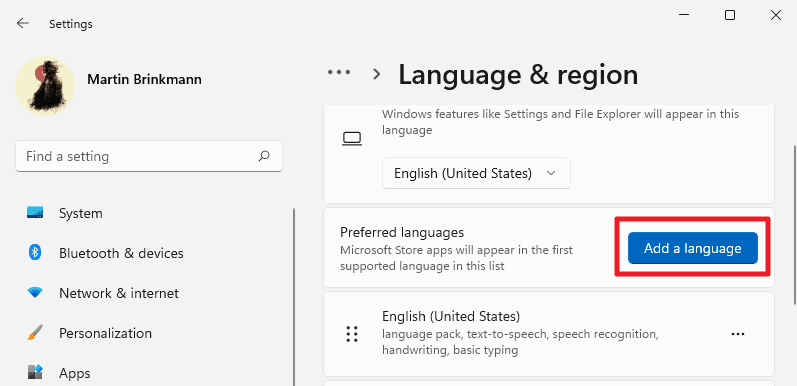
Windows 11 opens the "choose a language to install" window. You may use the search at the top or browse the selection of languages manually to find the preferred language. Note that it needs to support "Display language", which is the symbol with an "A".
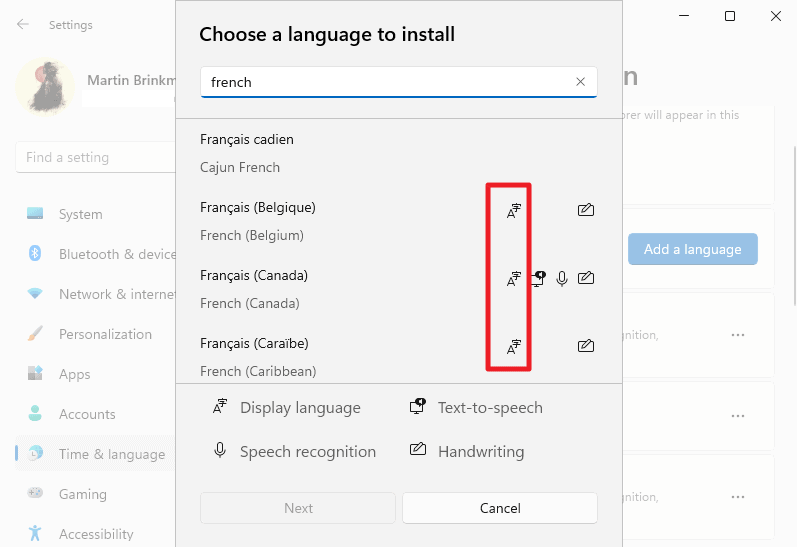
Select the preferred language with a click on its name and then Next; this opens the installation page. All you have to do on this page is to check the "Set as my Windows display language" box to make it the new display language.
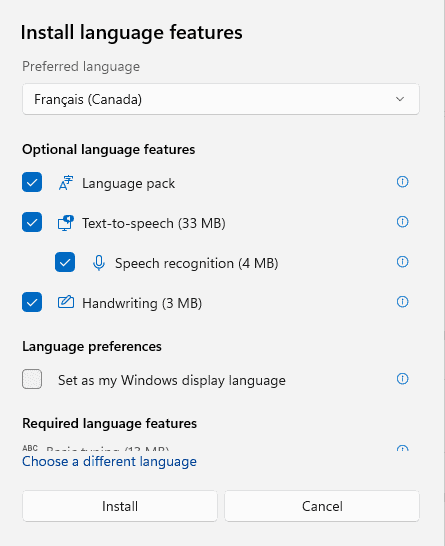
Select Install to complete the process. Windows returns to the main language & region settings page, and you are asked to sign-out to complete the interface language change.
Windows 11 will use the new interface language throughout the operating system starting with the next sign-in.
Thank you for being a Ghacks reader. The post How to change the Windows 11 display language appeared first on gHacks Technology News.


0 Commentaires