Google Play Games has finally been made available for Windows 11. This means that you can now download and play all your favorite Android games on a much bigger screen with far more processing power. The article below will show you how to use the new Google Play Games Windows 11 app to play Android games on your Windows PC right now.
Before we start
As is the norm with any guide, there are a few things we need to discuss first. It’s pertinent to note that while the utility is designed to work on Windows 11, there are still a few requirements that your PC needs to meet. To be able to enjoy Android games on your Windows 11 PC, it must:
- Be capable of running the Windows 11 OS
- Have at least an Intel UHD 630 graphics card (or comparable)
- Have a process with no fewer than 4 cores
- Have 8GB of RAM
- Be registered with a Windows 11 Administrator account
If you meet these criteria, you should be perfectly able to download and use the Google Play Games Windows 11 app without issue.
It’s also pertinent to note that while the Windows 11-based Google Play Games library is steadily expanding, not all the games available for Android devices are on the platform as yet. However, you can be assured that you’ll find something you enjoy as the utility currently hosts over 85 games from which you can choose. With that out of the way, let’s get into the guide.
Step 1: Download
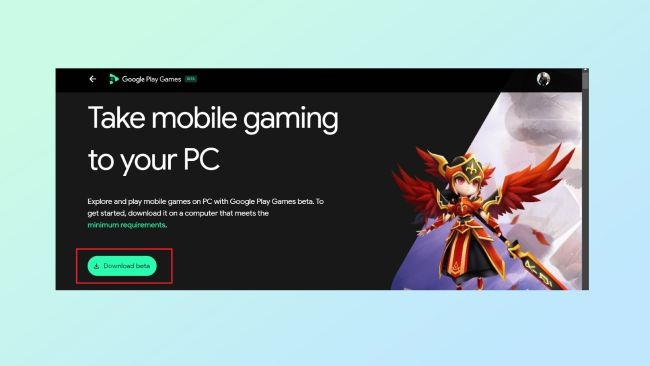
First, you’ll need to download the Google Play Games Windows 11 utility. You can do this on our website or on the Google Play Games website itself. Once you click download, you should see a file appear in the bottom of your browser interface, depending on which browser you use. If you can’t find the file, head into your browser’s downloads folder through the hamburger menu at the top right-hand side of the screen.
Step 2: Install
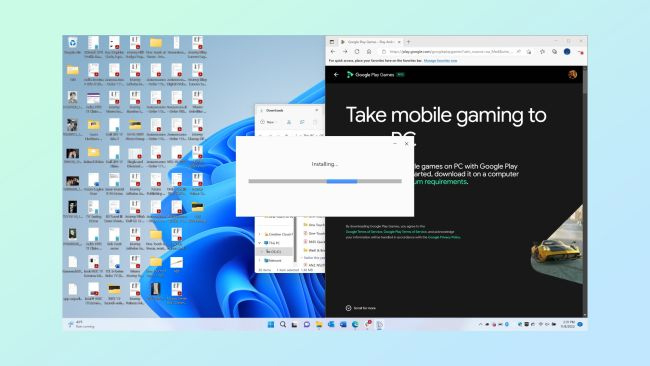
Next, you’ll need to click on the downloaded file to initiate the installation. If you have been unable to find the downloaded file through your browser, you’ll also find it in your file explorer utility under downloads. Once you initiate the installation, all you need to do is follow the on-screen prompts until the product has been successfully installed.
Step 3: Get started
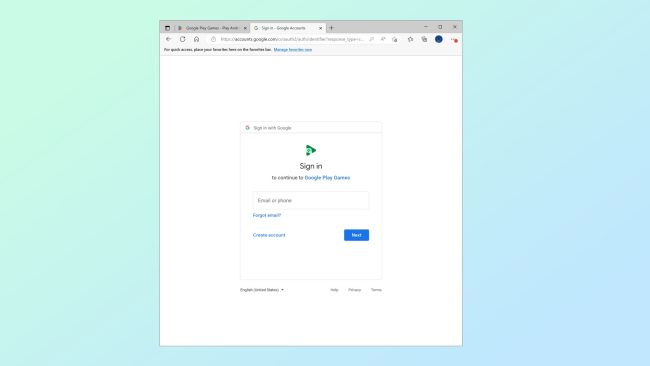
Now that the product is installed, you’ll be able to sign in with your Google account credentials. Once you’ve done this, you’ll have access to the entire Google Play Games catalog for Windows 11. Note that you might be prompted to enable the Windows Hypervision Platform. Simply follow the prompts on your screen, and you’ll be good to go. Once you’ve completed this last step, simply restart your PC. This will be in the form of a prompt as well.
When your PC restarts, you’ll be free to start downloading and playing Android games on your Windows 11.
Cross-platform capabilities
It’s a game-changer to be able to play Android games on your PC. But, even better than that is that all your progress on your Android device will sync up with your Windows 11 PC, provided you sign in with the same account credentials. Additionally, you won’t be stumbling around in the dark on PC because each compatible game comes with PC-specific instructions and a short tutorial on how to use the keyboard within the context of the game.
Although panning around the environment with a mouse in many games is a little less polished than would be the standard Android touch-and-swipe mechanism, it’s still an awesome way to experience your favorite Android titles.
Thank you for being a Ghacks reader. The post How to play Android games on Windows 11 appeared first on gHacks Technology News.


0 Commentaires